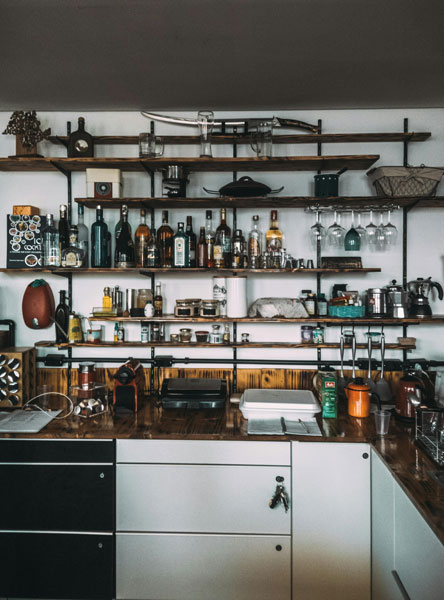
Let’s face it, dads deserve a sanctuary. A place to unwind after a long day of wrangling kids, mowing lawns, and being the general fix-it man of the house. But why settle for an ordinary recliner in the corner? Transform your basement (or any spare space) into the ultimate home bar, a place to entertain friends, relax with a good drink, and maybe even impress your significant other with your newfound mixology skills.

Here’s a rundown on building your dream home bar, from this dad’s perspective:
Step 1: Define Your Den
First things first, assess your space. Are you working with a finished basement or a rough around the edges utility room? No worries, either way! A little elbow grease (or hired help) can create a space you’ll be proud of.
Step 2: The Foundation (Literally)
Think about the kind of vibe you’re going for. Sophisticated man cave? Classic pub feel? Western saloon? Pinterest and browsing home improvement stores are a great way to get ideas for furniture and decor. Pro tip: Repurpose old furniture! An old buffet table can become a fantastic bar top, and those vintage chairs from the thrift store will add some character.
Step 3: Stocking Up – The Essentials
You don’t need to turn your home bar into a full-blown liquor store, but having a good selection of spirits is key. Here’s a dad-approved list of essentials:
- Base Spirits: Whiskey (blended and single malt), Vodka, Gin, Rum, Tequila
- Liqueurs: Coffee liqueur, A sweet vermouth for Manhattans, A dry vermouth for Martinis, A bottle of bitters for Old Fashioneds
- Mixers: Club soda, Tonic water, Cola, Ginger ale, Orange juice, Fresh lemons and limes (of course!)
Step 4: Gearing Up – The Right Tools
You don’t need a fancy cocktail shaker to make a great drink, but having a few bar tools will make your life easier and impress your guests. Here’s a basic list:
- Jigger: For accurate measuring (no more heavy-handed pours!)
- Bar spoon: For stirring and layering drinks
- Muddler: To release the flavors from fresh herbs and fruits
- Hawthorne strainer: To separate ice from your drink
- Citrus squeezer: Freshly squeezed juice makes all the difference
The Stools: These aren’t just about aesthetics; they need to be comfortable enough for lingering chats over after-dinner drinks. Think padded seats with backs for those longer sessions (because let’s be honest, conversations with friends tend to flow). Consider the height of your counter and choose stools that allow for easy conversation without feeling like you’re perched on a barstool throne.
Pro Tip: When it comes to bar stools, don’t underestimate the power of swivel. It makes getting in and out easier, especially if your bar is a bit tight on space.
Step 5: The Finishing Touches
Now that you’ve got the basics covered, it’s time to personalize your space. Hang some cool artwork, put up some neon signs (think “Open 24 Hours”), or frame some old movie posters. Add a comfy seating area for conversation, and maybe even a small fridge to keep your beers chilled. Most importantly, display your favorite shot glasses or travel mugs as a conversation starter.
Bonus Tip: Don’t be afraid to experiment with different recipes! There are countless resources online and in libraries for finding new cocktails to try.
Building a home bar is a fun and rewarding project. It’s a space to unwind, entertain, and maybe even bond with your kids (once they’re old enough, of course!). So grab your tools, hit the liquor store, and get building! Cheers to your new home bar, the envy of the neighborhood.

Leave a Reply